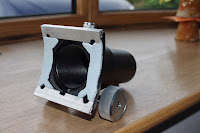
(You
read it right; not "saw" but "sawed".)
Four
years ago, after decades of prevarication, I finally bought the
telescope that I had promised myself since childhood. Despite
its modest price tag, the Chinese-built "Skywatcher"
reflecting telescope is an impressively precise piece of equipment.
Its mirror's surface is formed into a parabolic curve to an accuracy
better than a quarter of a wavelength of light across its entire 4½
inch diameter. This optical
perfection means that all of the light collected from a star is
brought to an impeccable focus with no loss of brightness due to cancellation of light waves arriving out of kilter.
This
incredible achievement of human civilization has shown me the wonders
of the universe, channelling ancient light from distant galaxies into
my pupil. For four years I have mollycoddled its pristine optical
surfaces which would fail if scratched by any abrasives such as
metal dust.
So,
it was with some trepidation that I took a hacksaw to my pride and
joy.
I had been toying with this drastic measure for a couple of years,
ever since realising that the 'scope could not be coaxed into
focussing starlight directly onto the sensor of my camera. The idea
was always swiftly dismissed, knowing that one slip of the saw would
write the thing off, and that even a successful cut would still leave
me with a pile of telescope pieces and no experience of assembling
and perfectly aligning them.
When, at last, I had a week's holiday to take at home, while the
children were still at school, I decided to take the plunge and
indulge two solitary obsessions: metalwork and astronomy. This blog
entry takes the form of a photo diary and how-to manual for the
foolhardy amateur astronomer.
How it works
You see, a telescope's job is to concentrate each star's light into a
bright pinpoint. It actually creates a miniature reconstruction of
the astronomical original, blazing away just inside the eyepiece
holder. The astronomer then views this bijou stellar facsimilie using
the eyepiece which is nothing more than a high-quality magnifying
glass, making it appear at a comfortable viewing distance. The
overall effect is both to magnify (spreading out the angular
separations of the stars) and to brighten the stars. It gives a
brighter view than the naked eye alone by collecting all of the light
that falls through the big hole at the front of the telescope, and
squeezing it through the much smaller area of the human pupil that
limits the naked eye's light-collecting power.
This is all summarized by the picture below, that shows some of the
wavefronts of starlight being concentrated and funnelled into an
observers eye. This picture demonstrates a refracting, rather than a
reflecting telescope, because it allows the wavefronts to be shown
more clearly. The objective mirror of a refracting telescope does
exactly the same job as the big objective lens at the front of the
refractor, except that it also sends the light back the way it came,
to be viewed through an eyepiece near the top of the telescope tube.
This would make the diagram more cluttered, with incoming and
outgoing light overlayed in the tube's interior.
So much for using a telescope with your eye. After doing so for a
while, I could no longer contain my flabbergastedness (is that a
word?) and wanted to share it. So, how do you photograph what the
telescope sees? There are basically two options:
(1)
Point a camera at the eyepiece, in place of your eye. This technique
goes by the grandiose name of afocal
astrophotography, (nicely explained
here)
and it supports an industry of various brackets and adapters to hold
the camera steady and align it with the eyepiece. I used this method
for a while, with some success. It allows you to choose the
magnification of the final picture by selecting an appropriate
eyepiece. But it has some drawbacks. A small fraction of the meagre
starlight is lost due to imperfect transmission at all of the glass
surfaces in the eypiece and in the camera's lens. Significantly more
can be lost due to various apertures and lens-stops in the
light-path.
A more crucial drawback is that anchoring a heavy camera to the end
of a long eyepiece and then swiveling it around to follow the sky can
put excessive bending forces on the poor old telescope, which was not
bred for heavy lifting. This was a particular problem for my
light-weight entry-level Skywatcher Skyhawk which, despite its
top-quality optics, holds the eyepiece in a nasty plastic focusser.
The focusser had to go. I bought a well-engineered replacement for
the plastic tat. Unfortunately, it was designed to fit a bigger
scope, so had to be shortened to avoid it crashing into the secondary
mirror when wound fully in. This meant re-making some of its parts.


Also, the new focusser barrel was wider, requiring a bigger hole in
the side of the scope. So, after disassembling the optics and
protecting most of the paintwork from scratches using masking tape
and duct tape, I filed away at the thin aluminium.
The focusser's base-plate was designed to fit the cyllindrical
surface of a larger-diameter 'scope. Re-shaping and fitting it
involved making some bespoke aluminium brackets...
...and resin to fill the gaps, molded to the right shape by pressing
it against the telescope itself. Greaseproof paper prevented it
sticking to the paintwork.
A better way
(2)
Rather than settling for the afocal
technique, most astrophotographers prefer to remove the unwieldy
eyepiece altogether, with a technique known as principal
focus astrophotography.
It's very simple. You remove the camera's own lens and use the
telescope as its lens. This means placing the camera's
light-sensitive surface (the film in an old-fashioned camera, or the
CMOS or CCD sensor nowadays) at the focal plane of the telescope, where all the starlight is concentrated. The focal plane is normally located inside the
eyepiece-holder. It needs to be shifted if its going to fall on the
camera's sensor, which can be done by moving the
telescope's objective mirror (or lens).
Unfortunately, in the Skywatcher Skyhawk, the mirror's adjusting
bolts won't move it far enough. So there was only one thing for it:
to shorten the telescope by just the right amount. Too little, and
the effort would be wasted as the focussed light would still not
reach the sensor. Too much, and the focusser would never extend far
enough to focus an eyepiece for normal operation.
Working out how much to cut off is easier said than done, since it's
tricky to measure the current position of the focal plane, or the
distance to the camera's sensor. These things can be calculated by
focusing on a nearby object and measuring its distance from the mirror.
The measurement needs to be accurate and the calculations error-free.
How confident would you feel about sawing off the right amount, based
on these scribblings?
A little saucepan came to the rescue.
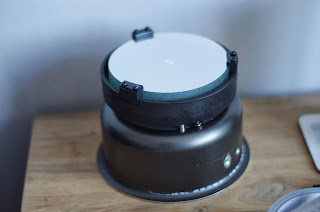
By lucky chance, this saucepan was a perfect press-fit inside the
telescope tube. So, by turning it into a temporary mount for the
mirror...
...I could slide the mirror into a new position, to try it out before
doing irrevocable violence to my treasured toy. The resulting affront
to nature, henceforth known as the Saucescope, confirmed my calculation, that a little over an inch needed to be removed.
So, with everything carefully marked out...
...and
heart in mouth, I took saw in hand and
gingerly cut into the blue-anodized aluminium. There was no margin
for error, because the cut end would not be hidden, but would simply
butt up against the mirror housing, with any scratches or wobbles in full view.
With the nerve-wracking part of the job done, all that remained was
to clean off every speck of glass-damaging metal dust, rebuild and
collimate the scope.
The camera now fits snugly in the new focal plane.
On the subsequent clear nights, I was relieved to find that the work
had all been worthwhile and I had not ruined my beautiful telescope. What could
have been a time-consuming disaster, given a moment's lapse in
concentration, turned out to be the most satisfying project I've
undertaken recently. Here are some of the results, photographed with
the new set-up:
The Dumbbell Nebula
The Pleiades
The Orion Nebula


.jpg)
